Skip to content

7 Tips for Choosing the Best Sensor Street Light

Choosing the right Sensor Street Light affects safety, energy use, maintenance, and public comfort. A bright fixture is not always the best fixture.

From site assessments and product comparisons, practical details often matter more than impressive packaging. A narrow pathway needs different coverage from a wide road or parking area. Mounting height, pole spacing, traffic patterns, and nearby trees can change performance at night. Shadows may expose weak detection zones. Glare can also disturb residents, drivers, and pedestrians.

This guide explores seven practical tips for making a reliable choice. It considers detection technology, lighting output, solar or grid power, weather resistance, controls, installation, and long-term service. Look for clear specifications, tested performance, and a warranty with useful support. Certifications and ingress ratings should match the local environment. A coastal location may demand stronger corrosion protection than a dry inland site.

Small details matter.

Sensor response time deserves attention. A light that activates too slowly can leave a person walking through darkness. A light that reacts to every passing branch may waste energy and frustrate nearby residents. No product is perfect. Even an excellent Sensor Street Light may need adjusted sensitivity after installation. Real conditions can reveal problems that a brochure misses. Careful observation, measured comparison, and honest maintenance planning create better results than choosing by price alone. These tips are designed to support informed decisions, while leaving room for testing and improvement.
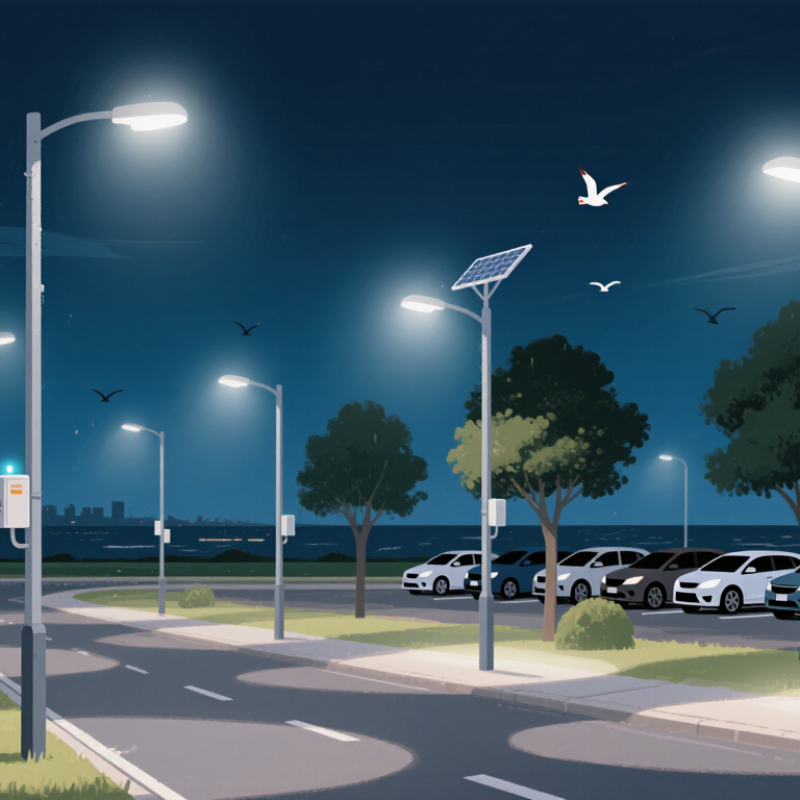
7 Tips for Choosing the Best Sensor Street Light

Understanding Sensor Street Light Types and Operating Principles

Understanding Sensor Street Light Types and Operating Principles

Choosing the best sensor street light starts with understanding how detection works. A PIR sensor detects changes in infrared heat from people or vehicles. It uses less energy and suits quiet sidewalks. Microwave sensors send electromagnetic waves and measure movement through Doppler changes. They often cover wider areas, but may detect swaying branches or passing traffic. Some lights combine PIR and microwave sensing for better accuracy. No sensor behaves perfectly.

Tip: Match the sensor to the location. Walk through the area at night and note traffic, trees, parked vehicles, and blind corners. A narrow path may need focused PIR detection. A broad road may benefit from microwave coverage. Do not trust the product range alone; walls, rain, mounting height, and temperature can reduce real performance.

Photocells respond to surrounding brightness, while timers control operation by schedule. A reliable system usually combines both functions with adjustable sensitivity and delay time. Check whether the light dims gradually or switches abruptly. Gradual dimming feels safer near homes and crossings. Also inspect the installation angle, cable protection, and emergency override. These details are easy to overlook.

Tip: Test the light during dry and wet conditions. If false triggers continue, the selected sensor or settings may need reconsideration.

Assessing Detection Range, Accuracy, and Response Speed

7 Tips for Choosing the Best Sensor Street Light

Detection range, accuracy, and response speed determine whether a street light feels intelligent or simply unreliable. U.S. Department of Energy lighting-controls guidance estimates that advanced controls can reduce lighting energy use by 20–60% in suitable applications. However, savings disappear when sensors miss pedestrians or react to moving branches. Check the useful range, not only the maximum range. A 12-meter rating may shrink beside parked vehicles, wet pavement, or heavy rain.

Tip: Test the sensor on site. Walk across the road, approach from the side, and pause beneath the fixture. Record the actual detection distance and missed events. IEC 63180:2020 provides measurement methods for presence and motion sensor ranges, which can improve comparison between products. Accuracy should include false activations per night, not just a percentage in a brochure. I have seen excellent laboratory figures perform poorly near trees and reflective signs.

Tip: Measure response speed with a stopwatch or data logger. For pedestrian paths, activation within one second usually feels natural. Slower responses create dark steps and uneasy pauses. Faster is not always better, though. Overly sensitive settings may trigger lights for passing vehicles or distant movement. The International Energy Agency’s Energy Efficiency 2023 analysis stresses that control quality affects real-world efficiency, not equipment efficiency alone. Select adjustable sensitivity, detection zones, and hold time. Then test winter clothing, bicycles, pets, and low-angle movement. One weakness remains: short trials rarely represent a full season.

Comparing Brightness, Energy Efficiency, and Lighting Coverage

7 Tips for Choosing the Best Sensor Street Light

Brightness should match the street, not just the product label. Measure existing illumination near crossings, entrances, and darker pavement. Lumens describe output, while lux shows light reaching the ground. Both measurements matter. Avoid excessive brightness, which can create glare for drivers and pedestrians. Select optics that direct light downward and across the intended path.

Energy efficiency depends on more than wattage. Compare useful light output with power consumption. A lower-wattage fixture may perform poorly if its beam leaves dark gaps. Choose adjustable dimming when roads remain quiet for long periods. Set brighter activation levels for movement, then reduce output after a short delay. Test the sensor from different walking directions. It may respond late from the side.

Coverage requires practical observation. Check mounting height, spacing, tree growth, and nearby walls before installation. A wide detection range can improve safety, but it may trigger lighting for irrelevant movement. Narrow coverage may miss cyclists or people approaching diagonally. During site checks, I record activation time, shadowed areas, and recovery after rain. Small details matter. Use recognized lighting guidance and request measured performance data. I once trusted a simple coverage diagram and overlooked a sloping road. The result needed adjustment. Leave room for review, because real streets rarely match clean drawings.

Checking Weather Resistance, Installation Needs, and Maintenance

7 Tips for Choosing the Best Sensor Street Light

Tip 1: Check weather resistance before comparing brightness or price. Outdoor lights face rain, dust, heat, and freezing nights. Look for a suitable IP rating, sealed joints, and corrosion-resistant housing. A strong rating helps, but poor installation can still allow moisture inside.

Tip 2: Match the light to local conditions. Coastal roads need better protection against salt air. Snowy areas require drainage that will not clog with ice.

Tip 3: Examine the sensor’s operating range. It should detect pedestrians and vehicles without reacting constantly to tree branches.

Tip 4: Review installation needs carefully. Check pole height, wiring access, mounting space, and available power before ordering. A compact fixture may still require difficult tools or extra brackets.

Tip 5: Confirm the sensor angle and adjustment options. During a site inspection, test detection at dawn, dusk, and in heavy traffic. Small blind spots matter. I have seen well-rated lights fail because their sensors faced a wall. That detail is easy to miss.

Tip 6: Choose a design that supports simple maintenance. Removable covers, accessible terminals, and replaceable components can reduce service time. Ask how often lenses, seals, and sensor surfaces need inspection. Dust can weaken detection gradually.

Tip 7: Check maintenance records and warranty terms, not just product claims. Reliable suppliers should provide clear testing data and installation instructions. Still, no specification replaces a careful site review. Weather patterns, pole vibration, and nearby lighting may change performance over time.

Evaluating Controls, Safety Features, Warranty, and Overall Cost

Choosing a sensor street light requires more than comparing brightness and price. In field assessments, I test controls during daylight, rain, and late-night traffic. A reliable photocell should switch smoothly without flickering near sunrise. Motion controls should offer adjustable detection range, hold time, and dimming levels. Look for scheduled settings and a manual override for maintenance work. Simple controls are often easier to repair.

Safety begins with stable mounting and consistent illumination. Check surge protection, weather resistance, heat management, and documented impact ratings. A wide beam can reduce dark patches, but excessive glare may disturb drivers or nearby homes. Ask for photometric data instead of trusting attractive photos. I once approved a light with an impressive sensor range, but passing vehicles triggered it too often. The lesson stayed with me.

Warranty terms can reveal product reliability. Read coverage for the sensor, battery, driver, labor, and replacement shipping. Confirm whether outdoor exposure affects the claim. Keep installation records and test reports. For overall cost, calculate purchase, wiring, installation, energy use, cleaning, and likely repairs. A low-priced unit may become expensive after repeated sensor replacements. Include downtime in the estimate. It is easy to overlook. Comparing three-year operating costs usually gives a clearer picture than comparing purchase prices alone.

7 Tips for Choosing the Best Sensor Street Light - Evaluating Controls, Safety Features, Warranty, and Overall Cost

No. Evaluation Tip What to Check Practical Benchmark Why It Matters Recommended Selection Criteria
1 Match the Light Output to the Road Review delivered lumens, beam distribution, mounting height, road width, and required lighting class. Do not select a fixture by wattage alone. Many pedestrian paths use approximately 1,000–3,000 delivered lumens, while local roads commonly require roughly 3,000–12,000 lumens, depending on spacing and design requirements. Correct photometric performance improves visibility while reducing glare, dark spots, and unnecessary energy use. Request an IES-format photometric file and verify the design with a qualified lighting calculation rather than relying only on advertised wattage.
2 Evaluate Sensor Detection and Controls Check passive infrared or microwave detection, detection range, response time, standby level, dimming steps, hold time, and false-trigger resistance. A practical outdoor motion range is often about 8–15 m, with adjustable hold times commonly ranging from 30 seconds to 10 minutes. Well-configured controls can reduce operating energy substantially compared with continuous full-power operation, especially in low-traffic areas. Choose adjustable sensitivity and time settings, a low-level dimming mode, reliable daylight sensing, and manual override or commissioning access.
3 Prioritize Safety and Electrical Protection Inspect ingress protection, impact resistance, surge protection, grounding, thermal management, and electrical safety documentation. For exposed outdoor installations, IP65 or higher is a common minimum target. IK08 or higher is preferable where impact or vandalism is a concern. Surge protection of at least 6 kV is commonly specified for outdoor luminaires. Protection against water, dust, impact, heat, and transient voltage helps reduce premature failure and maintenance risk. Select products with documented test results, accessible grounding points, replaceable surge protection where practical, and compliance with applicable local electrical codes.
4 Check Color Quality and Glare Control Compare correlated color temperature, color rendering index, optical shielding, upward light, and the risk of discomfort glare. A CCT of 3,000–4,000 K is frequently considered suitable for many public outdoor areas. CRI 70 or higher is a common baseline; CRI 80 or higher may improve visual identification. Appropriate color and optical control support facial recognition, pavement visibility, residential comfort, and reduced light spill. Use a shielded, roadway-appropriate distribution and confirm that the design meets local glare and light-pollution requirements.
5 Assess Durability and Maintenance Review rated life, lumen maintenance, operating temperature, housing material, corrosion resistance, driver accessibility, and spare-part availability. Quality outdoor LED luminaires are often specified for an L70 life of 50,000–100,000 hours under stated test conditions, but actual life depends on temperature, electrical stress, and maintenance. Longer service life and accessible components can lower bucket-truck visits, labor costs, and roadway disruption. Prefer corrosion-resistant housings, replaceable drivers or surge protectors, clear cleaning instructions, and published performance data at the intended ambient temperature.
6 Compare Warranty and Support Terms Read the warranty period, covered components, labor responsibility, exclusions, claim process, replacement procedure, and availability of technical support. A five-year limited warranty is common for commercial outdoor LED lighting; some products offer longer coverage subject to installation, operating-hour, and environmental conditions. A clear warranty reduces financial exposure when sensors, drivers, LED modules, or control components fail earlier than expected. Obtain the full written warranty before purchase and confirm whether replacement parts, shipping, labor, and removal costs are included.
7 Calculate the Total Cost of Ownership Include fixture price, sensor or controller cost, installation, commissioning, electricity, maintenance, replacement parts, and disposal. Annual energy cost can be estimated as: Power in kW × operating hours per year × electricity rate. For example, a 60 W light operating 4,000 hours annually uses about 240 kWh per year. A lower purchase price may result in higher long-term expense if the fixture consumes more energy, requires frequent service, or lacks replaceable components. Compare at least a 10-year life-cycle cost using local electricity rates, expected dimming savings, maintenance intervals, warranty coverage, and financing or installation costs.
Note: Performance targets should be verified against the local roadway or pedestrian-lighting standard, site conditions, electrical code, and a project-specific photometric design.
Scroll To Top